

 1:24 PM
 MISDUONG

Ever since Windows 95, the Windows key (or Win key) is
ubiquitous on PC keyboards. With each new release of Windows, Microsoft
has added new keyboard shortcuts with the Win key. Here is a complete
list of all Winkey shortcuts.
The Win key when pressed by itself opens the Start Menu on systems which have it. On Windows 8 it opens the Start screen. Here are all the other Win key combinations which you may not be aware of:
Win+A: Does nothing
Win+B: Moves the focus to the notification area (System tray)
Win+C: Shows Charms, and the date & time (Windows 8 and later)
Win+D: Shows the Desktop. When you press Win+D again, it restores the open windows.
Win+E: Opens Explorer
Win+F: Opens file search. Prior to Windows 8, this opened Explorer search. Now it opens the Search pane with Files selected for searching
Win+Ctrl+F: Opens the Find Computers dialog (for Active Directory/domain joined PCs)
Win+G: Brings gadgets to the top of other windows.
Win+H: Opens the Share charm on Windows 8
Win+I: Opens the Settings charm on Windows 8
Win+J: Does nothing
Win+K: Opens the Devices charm
Win+L: Locks the PC or lets you switch users
Win+M: Minimizes all windows. Win+Shift+M does undo minimize all
Win+N: Does nothing in Windows. In Microsoft OneNote, it opens a new Note.
Win+O: Locks or unlocks the orientation of the device if it's a tablet PC so if even if you rotate it, it won't rotate
Win+P: Opens the UI to project to another display or projector
Win+Q: Opens the app specific search in Windows 8.1. e.g. In Modern IE, it will search Internet Explorer. In PC Settings, it will search Settings and so on.
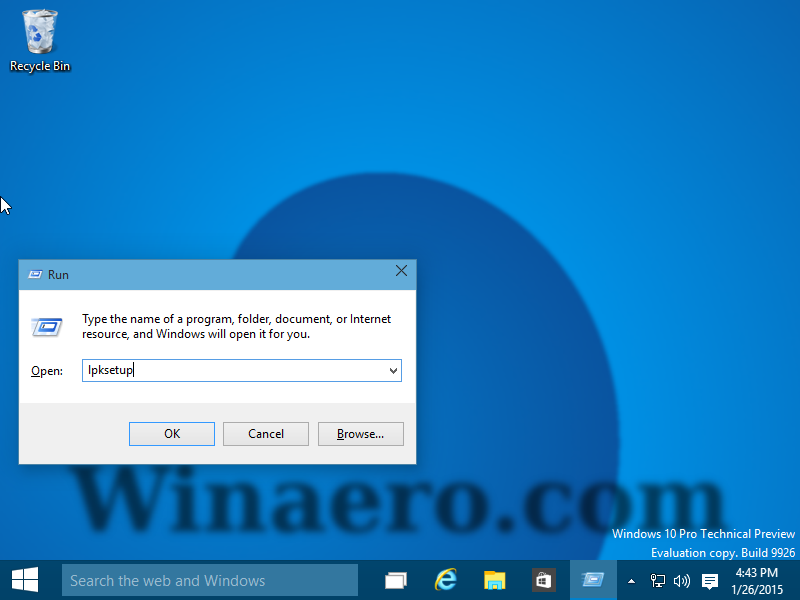
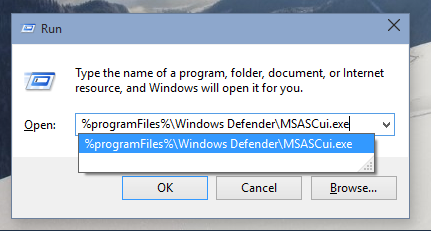
Win+R: Opens the Run dialog
Win+S: Opens the search with "Everywhere" selected
Win+T: Focuses on the taskbar icons. Pressing Win+T again moves the focus to the next icon.
Win+U: Opens Ease of Access Center (or Utility Manager in Windows XP/2000)
Win+V: Focuses on the Metro style toast notifications and cycles through them
Win+W: Opens the search pane with Settings selected
Win+X: Opens the Power Users menu on Windows 8 and later. On Windows 7/Vista, it opens Mobility Center
Win+Y: Does nothing
Win+Z: Shows the App Bar in a Modern app, same as right clicking inside a Modern app
Win+1/2/3....0: Opens or switches to the correspondingly numbered Taskbar button
Win+'+': Opens Magnifier and zooms in
Win+'-': Zooms out in Magnifier
Win+Esc: Exits Magnifier if it's running
Win+F1: Opens Help and Support
Win+Pause/Break: Opens System Properties
Win+Print screen: Takes a screenshot in Windows 8 and saves it to the Screenshots folder
Win+Home: Same as Aero Shake (minimizes all windows except the foreground window)
Win+Left arrow key: Snaps a desktop app's window to the left. In Windows 8.1, it also snaps a Modern app's window to the left.
Win+Right arrow key: Snaps a desktop app's window to the right. In Windows 8.1, it also snaps a Modern app's window to the right.
Win+Up arrow key: Maximizes a window. In Windows 8.1, it also makes a snapped Modern app full screen.
Win+Down arrow key: Minimizes a window. In Windows 8.1, it suspends a Metro app and takes you to either the Desktop or the Start screen depending on your Start screen settings
Win+Page Down: In Windows 8.0, it moves a Modern app's window to the next display if multiple monitors are connected. In Windows 8.1, this shortcut is moved to Win+Shift+Right arrow key to be consistent with desktop apps
Win+Page Up: moves a Modern app's window to the previous display if multiple monitors are connected. In Windows 8.1, this shortcut is moved to Win+Shift+Left arrow key to be consistent with desktop apps
Win+Enter: Starts Narrator (on Windows 8 and later)
Win+Alt+Enter: Starts Media Center
Win+Space: In Windows 7, it does an Aero Peek. In Windows 8, it switches the input language
Win+Comma (,): In Windows 8, this is the new key for Aero Peek
Win+Period (.): Shows you which is the active window (useful when two Modern apps are snapped).
Win+Tab: In Windows 8 and later, when you press Win+Tab and release it, you can switch between Modern apps, the Start screen and the Desktop. If you continue to hold the Win key, it will show you the Switcher UI and when you let go of the Win key, it will switch. In Windows 7/Vista, Win+Tab shows Flip 3D which operates similarly.
Ctrl+Win+Tab: Shows the Switcher UI in sticky mode so you can use keyboard arrow keys or mouse to switch. Ctrl+Win+Tab also opens Flip 3D in sticky mode in Windows 7/Vista
Let us know if we missed any Win key shortcuts and tell us if you discovered any new ones from this article. :)
The Win key when pressed by itself opens the Start Menu on systems which have it. On Windows 8 it opens the Start screen. Here are all the other Win key combinations which you may not be aware of:
Win+A: Does nothing
Win+B: Moves the focus to the notification area (System tray)
Win+C: Shows Charms, and the date & time (Windows 8 and later)
Win+D: Shows the Desktop. When you press Win+D again, it restores the open windows.
Win+E: Opens Explorer
Win+F: Opens file search. Prior to Windows 8, this opened Explorer search. Now it opens the Search pane with Files selected for searching
Win+Ctrl+F: Opens the Find Computers dialog (for Active Directory/domain joined PCs)
Win+G: Brings gadgets to the top of other windows.
Win+H: Opens the Share charm on Windows 8
Win+I: Opens the Settings charm on Windows 8
Win+J: Does nothing
Win+K: Opens the Devices charm
Win+L: Locks the PC or lets you switch users
Win+M: Minimizes all windows. Win+Shift+M does undo minimize all
Win+N: Does nothing in Windows. In Microsoft OneNote, it opens a new Note.
Win+O: Locks or unlocks the orientation of the device if it's a tablet PC so if even if you rotate it, it won't rotate
Win+P: Opens the UI to project to another display or projector
Win+Q: Opens the app specific search in Windows 8.1. e.g. In Modern IE, it will search Internet Explorer. In PC Settings, it will search Settings and so on.
Win+R: Opens the Run dialog
Win+S: Opens the search with "Everywhere" selected
Win+T: Focuses on the taskbar icons. Pressing Win+T again moves the focus to the next icon.
Win+U: Opens Ease of Access Center (or Utility Manager in Windows XP/2000)
Win+V: Focuses on the Metro style toast notifications and cycles through them
Win+W: Opens the search pane with Settings selected
Win+X: Opens the Power Users menu on Windows 8 and later. On Windows 7/Vista, it opens Mobility Center
Win+Y: Does nothing
Win+Z: Shows the App Bar in a Modern app, same as right clicking inside a Modern app
Win+1/2/3....0: Opens or switches to the correspondingly numbered Taskbar button
Win+'+': Opens Magnifier and zooms in
Win+'-': Zooms out in Magnifier
Win+Esc: Exits Magnifier if it's running
Win+F1: Opens Help and Support
Win+Pause/Break: Opens System Properties
Win+Print screen: Takes a screenshot in Windows 8 and saves it to the Screenshots folder
Win+Home: Same as Aero Shake (minimizes all windows except the foreground window)
Win+Left arrow key: Snaps a desktop app's window to the left. In Windows 8.1, it also snaps a Modern app's window to the left.
Win+Right arrow key: Snaps a desktop app's window to the right. In Windows 8.1, it also snaps a Modern app's window to the right.
Win+Up arrow key: Maximizes a window. In Windows 8.1, it also makes a snapped Modern app full screen.
Win+Down arrow key: Minimizes a window. In Windows 8.1, it suspends a Metro app and takes you to either the Desktop or the Start screen depending on your Start screen settings
Win+Page Down: In Windows 8.0, it moves a Modern app's window to the next display if multiple monitors are connected. In Windows 8.1, this shortcut is moved to Win+Shift+Right arrow key to be consistent with desktop apps
Win+Page Up: moves a Modern app's window to the previous display if multiple monitors are connected. In Windows 8.1, this shortcut is moved to Win+Shift+Left arrow key to be consistent with desktop apps
Win+Enter: Starts Narrator (on Windows 8 and later)
Win+Alt+Enter: Starts Media Center
Win+Space: In Windows 7, it does an Aero Peek. In Windows 8, it switches the input language
Win+Comma (,): In Windows 8, this is the new key for Aero Peek
Win+Period (.): Shows you which is the active window (useful when two Modern apps are snapped).
Win+Tab: In Windows 8 and later, when you press Win+Tab and release it, you can switch between Modern apps, the Start screen and the Desktop. If you continue to hold the Win key, it will show you the Switcher UI and when you let go of the Win key, it will switch. In Windows 7/Vista, Win+Tab shows Flip 3D which operates similarly.
Ctrl+Win+Tab: Shows the Switcher UI in sticky mode so you can use keyboard arrow keys or mouse to switch. Ctrl+Win+Tab also opens Flip 3D in sticky mode in Windows 7/Vista
Let us know if we missed any Win key shortcuts and tell us if you discovered any new ones from this article. :)
 Posted in: Windows10