How to manually create Software Restriction Policies to block CTB Locker:
To manually create Software Restriction Policies you need to do it
within the Local Security Policy Editor or Group Policy Editor. If you
are a home user you should create these policies using the Local
Security Policy editor. If you are on a domain, then your domain
administrator should use the Group Policy Editor. To open the Local
Security Policy editor, click on the
Start button and type
Local Security Policy and select the search result that appears. You can open the Group Policy Editor by typing
Group Policy instead. In this guide we will use the Local Security Policy Editor in our examples.
Once you open the Local Security Policy Editor, you will see a screen similar to the one below.
Once the above screen is open, expand
Security Settings and then click on the
Software Restriction Policies
section. If you do not see the items in the right pane as shown above,
you will need to add a new policy. To do this click on the
Action button and select
New Software Restriction Policies. This will then enable the policy and the right pane will appear as in the image above. You should then click on the
Additional Rules category and then right-click in the right pane and select
New Path Rule.... You should then add a Path Rule for each of the items listed below.
If the Software Restriction Policies cause issues when trying to run legitimate applications, you should see
this section on how to enable specific applications.
Below are a few Path Rules that are suggested you use to not only
block the infections from running, but also to block attachments from
being executed when opened in an e-mail client.
Block CTB Locker executable in %AppData%
Path: %AppData%\*.exe
Security Level: Disallowed
Description: Don't allow executables to run from %AppData%.
Block CTB Locker executable in %LocalAppData%
Path if using Windows XP: %UserProfile%\Local Settings\*.exe
Path if using Windows Vista/7/8: %LocalAppData%\*.exe
Security Level: Disallowed
Description: Don't allow executables to run from %AppData%.
Block Zbot executable in %AppData%
Path: %AppData%\*\*.exe
Security Level: Disallowed
Description: Don't allow executables to run from immediate subfolders of %AppData%.
Block Zbot executable in %LocalAppData%
Path if using Windows XP: %UserProfile%\Local Settings\*\*.exe
Path if using Windows Vista/7/8: %LocalAppData%\*\*.exe
Security Level: Disallowed
Description: Don't allow executables to run from immediate subfolders of %AppData%.
Block executables run from archive attachments opened with WinRAR:
Path if using Windows XP: %UserProfile%\Local Settings\Temp\Rar*\*.exe
Path if using Windows Vista/7/8: %LocalAppData%\Temp\Rar*\*.exe
Security Level: Disallowed
Description: Block executables run from archive attachments opened with WinRAR.
Block executables run from archive attachments opened with 7zip:
Path if using Windows XP: %UserProfile%\Local Settings\Temp\7z*\*.exe
Path if using Windows Vista/7/8: %LocalAppData%\Temp\7z*\*.exe
Security Level: Disallowed
Description: Block executables run from archive attachments opened with 7zip.
Block executables run from archive attachments opened with WinZip:
Path if using Windows XP: %UserProfile%\Local Settings\Temp\wz*\*.exe
Path if using Windows Vista/7/8: %LocalAppData%\Temp\wz*\*.exe
Security Level: Disallowed
Description: Block executables run from archive attachments opened with WinZip.
Block executables run from archive attachments opened using Windows built-in Zip support:
Path if using Windows XP: %UserProfile%\Local Settings\Temp\*.zip\*.exe
Path if using Windows Vista/7/8: %LocalAppData%\Temp\*.zip\*.exe
Security Level: Disallowed
Description: Block executables run from archive attachments opened using Windows built-in Zip support.
You can see an event log entry and alert showing an executable being blocked:
If you need help configuring this, feel free to ask in the
CTB Locker help topic.
How to allow specific applications to run when using Software Restriction Policies
If you use Software Restriction Policies, or CryptoPrevent, to block
CTB Locker you may find that some legitimate applications no longer run.
This is because some companies mistakenly install their applications
under a user's profile rather than in the Program Files folder where
they belong. Due to this, the Software Restriction Policies will prevent
those applications from running.
Thankfully, when Microsoft designed Software Restriction Policies
they made it so a Path Rule that specifies a program is allowed to run
overrides any path rules that may block it. Therefore, if a Software
Restriction Policy is blocking a legitimate program, you will need to
use the
manual steps
given above to add a Path Rule that allows the program to run. To do
this you will need to create a Path Rule for a particular program's
executable and set the Security Level to
Unrestricted instead of Disallowed as shown in the image below.
Once you add these Unrestricted Path Rules, the specified applications will be allowed to run again.


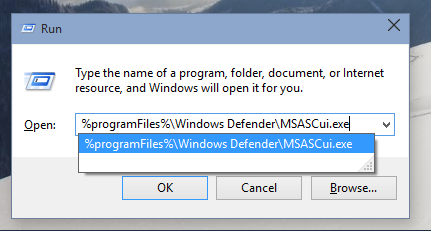
 3:05 PM
 MISDUONG

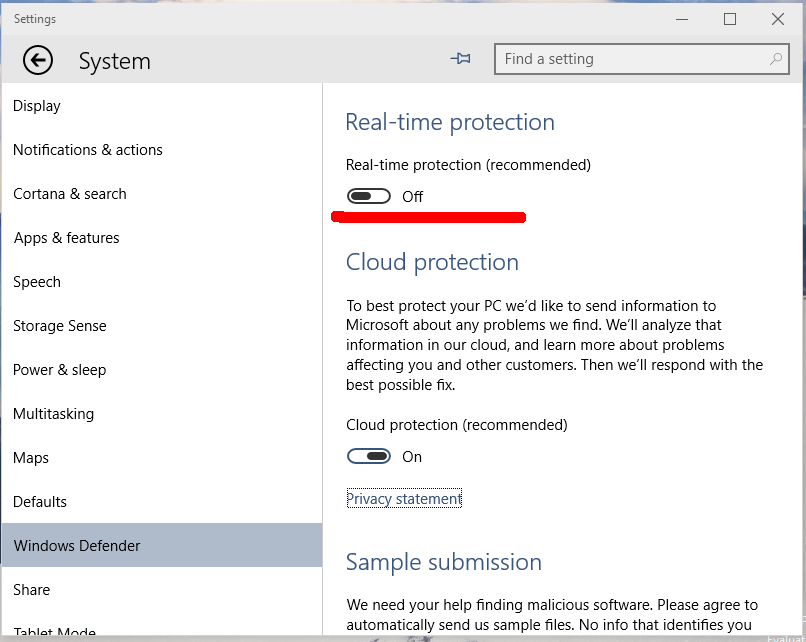
 The Settings app will be opened:
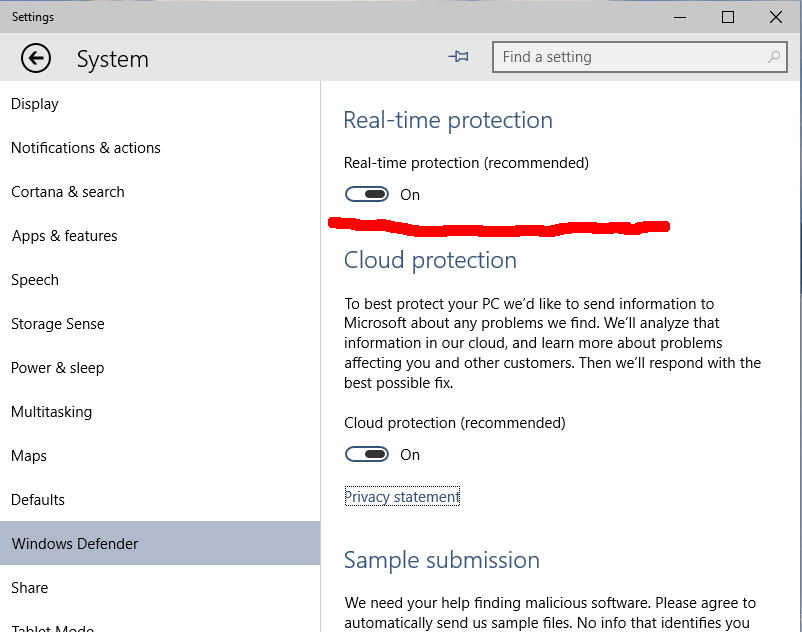
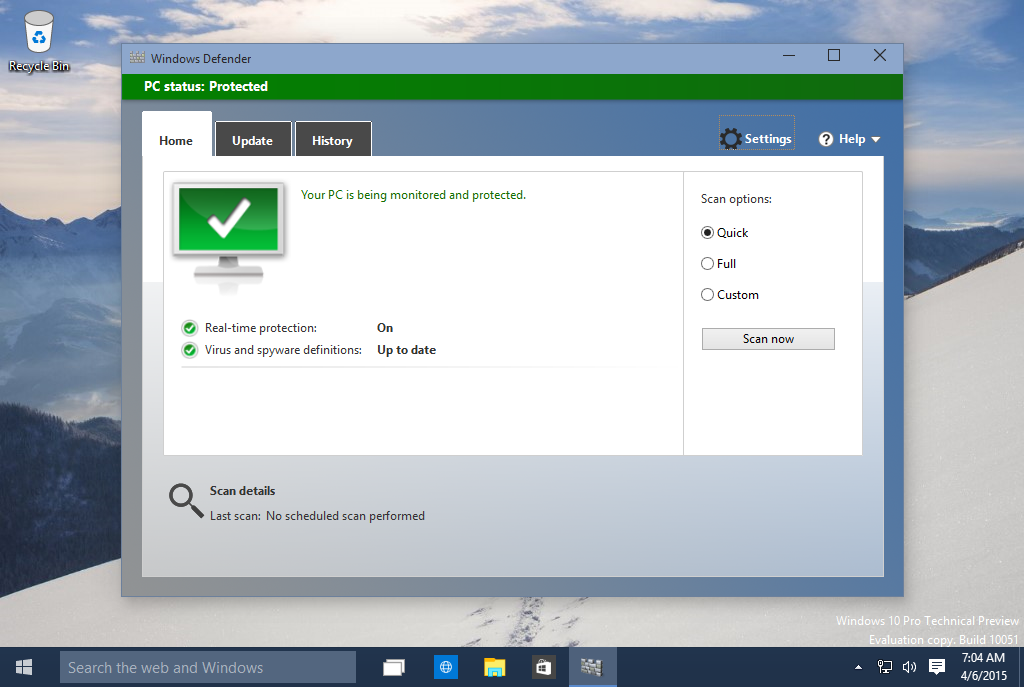
 If you will open Windows Defender once again, it look as follows:
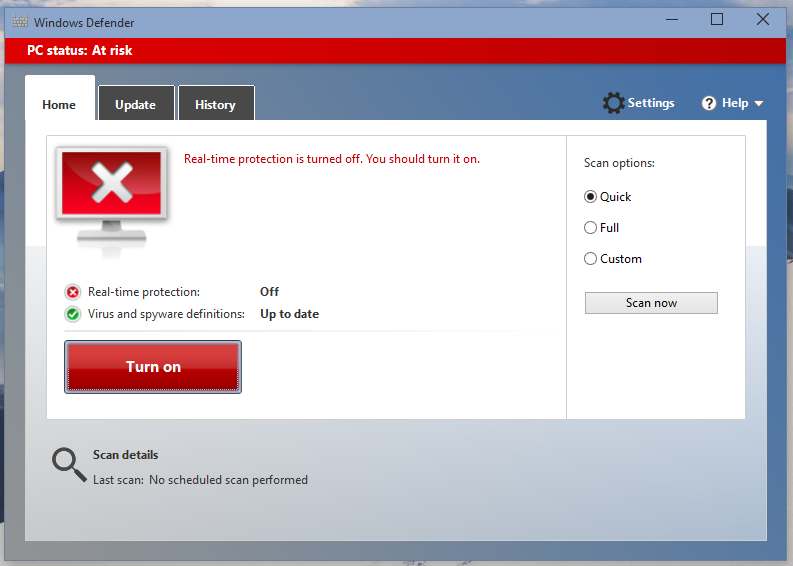
 Posted in: Windows10


